Installing Pi-Hole on Raspberry Pi
Published on Mar 3, 2019 ⸱ 8 min read ⸱ 37 views

Bought my first RaspberryPi back in 2015 and have been trying to code my first project since then. Cut to 2019, no project completed. Tried doing a Python project, Docker one and then something else. Nothing came together. Pi-Hole was also on the radar but thought it was too elementary for me. Little did I know, getting Pi-Hole up and running on my RPi would not only be a task in itself but it will also be my first project.
For the uninitiated, Pi-Hole is an open source project that works like a network wide ad blocker (but better) without any additional setting on your devices. Think of it as a software that sits between your home/small office router and your devices and blocks any advertisement networks (e.g. Google Double Click, Crashalytics and so on) that usually gets loaded with websites. Because it works at the router level, website load times are significantly improved.
Time to chalk out the steps to install Pi-Hole on your RPi. There are many guides out on the internetz to install Pi-Hole but I relied on the awesome Troy Hunt who doesn't really do an installation guide but recommends his friend Scott Helme's guide. Scott's guide to install Pi-Hole is very detailed and gives a very thorough step by step installation guide. He outlines how to install Pi-Hole to serve requests via secure tunnels using CloudFlare's public DNS server i.e. 1.1.1.1. If that line is too geeky for you, Scott's guide basically involves setting up a private and secure, ad blocked network. In comparison, most other guides, ignore the "private and secure" part.
I tried using Scott's method to install the "private and secure, ad blocked network" but I kept running into problems with the installation. Tried reinstalling by flashing my RPi several times over to no avail. Finally, I decided to install Pi-Hole without the "private and secure" bit i.e. without the secure CloudFlare tunnel. This time it worked. Recreating my steps for anyone who wants to follow. Obviously, for any of this you need a Raspberry Pi, buy one here (non affiliate Amazon.in link) if you haven't already. Here goes:
Step 1: Install the latest OS version of Raspbian (RPi OS)
Not going to relay the steps for this as there's a lot of material online. I used this guide. In short, download the latest version of Raspbian OS, format your micro SD card using your computer's native app, burn (copy) the Raspbian OS image file on the micro SD Card using Win32 Disk Imager and you're good to go. Once done, plug in your RPi and among other settings, remember to enable SSH and set a password for your RPi.
Step 2: Install Pi-Hole on your RaspberryPi
The Pi-Hole Foundation has made it super easy to install Pi-Hole on your RPi - literally, install with just one line of code. That's super impressive. Even large corporate businesses cannot achieve that. A few hygiene steps before you install Pi-Hole:
Type the following commands in your CLI:
sudo apt-get update
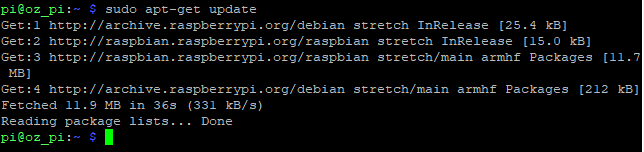
sudo apt-get upgrade
Everything should go according to plan (not throw up any errors). Once that's done, type the glorious one liner to install Pi-Hole:
curl -sSL https://install.pi-hole.net | bash
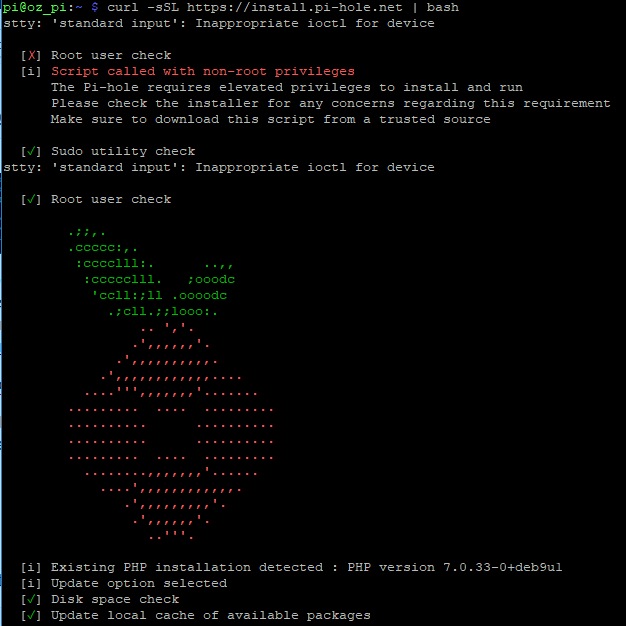
During the installation, follow all the steps as defaults and continue. Just make sure you're reading everything and not just pressing "Enter" like we "Agree" to all online agreements. At the last splash screen you will be shown the final details to access the Pi-Hole Admin panel. This is important as your Pi-Hole admin panel password as well is mentioned in this screen. Even if you inadvertently skip this section, you can reset your pi-hole password by running the following command:
sudo pihole -a -p
You will be prompted for the new password. If you enter an empty password, the password requirement will be removed from the web interface.
Step 3: Change the DNS settings on your router
First of all, reserve an internal IP address for your RPi. To do this, SSH into your RPi and find it's MAC address (unique hardware address) and IP address. You can type "ifconfig" in your CLI and you should find it there.

Armed with your MAC and IP addresses, open up your router's admin page. Navigate to a DHCP Address Reservation section (most modern router's should allow you to do this) and add your RPi MAC and IP addresses to reserve the IP in your network. Once added it will look like this. (obviously, the grey patch in the image is to mask the content but your MAC address will be in this format - XX:XX:XX:XX:XX:XX)
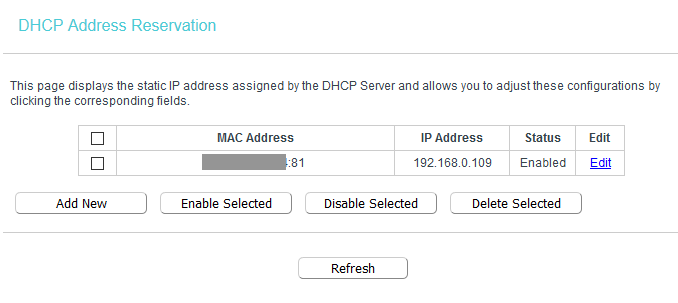
Then, in your router's admin section, navigate to DHCP Settings and change the Primary DNS Server and Secondary DNS Server to your RPi's IP Address.

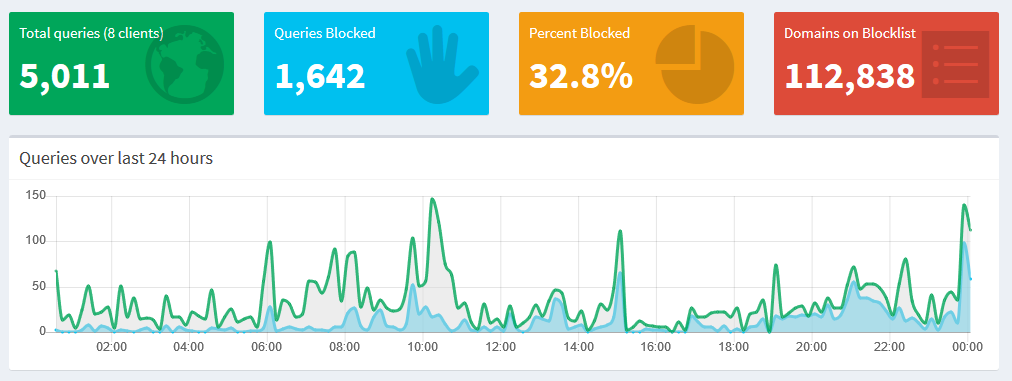
That's it. You're done. Pi-Hole is installed and configured. You can start loading websites from your devices and ads should be blocked as soon as your IP address lease refreshes.
You can visit [YOUR-RPI-IP-ADDRESS]/admin and begin seeing your stats from the get go. Had taken the below screenshot after one day of Pi-Hole being live. Not bad, eh!
Common Problems one encounters during installation:
a. dnsmasq is not installed: This is an irritating problem and you can run into it without knowing that this problem exists. If you get this error or your connected device doesn't seem to load any website, run the below command:
sudo apt-get install dnsmasq
dnsmasq --version
Verify if dnsmasq is properly installed by running the --version command. If all is installed correctly, you should see the below:

b. FTL Engine not Installed: This error shows up during Pi-Hole installation which means your Pi-Hole instance is not installed properly. I got this error several times and was just unable to figure out why. Initially I did not even know this was causing the error. Hence, please read every step of the installation as it happens. Moving on to how this issue was resolved for me, I found a solution here that worked for me. Type the following commands:
sudo nano /etc/resolv.conf
Paste the CloudFlare public DNS server i.e. 1.1.1.1 in the name server section. Comment out any other name servers that might have been existing. Save the resolv.conf file then type the following command
pihole -r
This will repair your Pi-Hole installation instance and things should work fine.
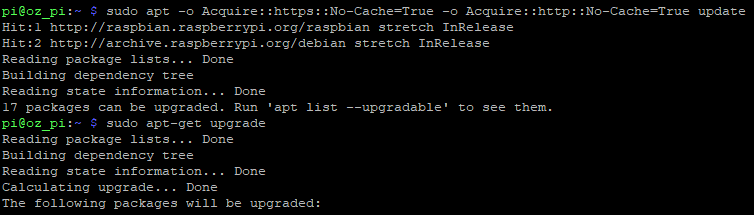
c. apt-update error: There might be instances when you try to update all RPi dependencies that you will be faced with errors. Never understood why I kept getting that error. Searched online and found a solution here. Basically, instead of the usual "apt-get update" command, you type the following:
sudo apt -o Acquire::https::No-Cache=True -o Acquire::http::No-Cache=True update
Once you run the above command, you need to "sudo apt-get upgrade" again. Honestly, I don't know what that line means, but I will figure it out. But running this line of code solved the errors for me and dependencies were updated smoothly. The below screenshot is just an excerpt, once you run "upgrade" there's a whole bunch of statuses that show up and you shouldn't get any errors.
Bonus: Get a dark theme for your Pi-Hole! I love dark themes across all services I use on my devices and detest services that don't have an option for a dark theme. Not that I went around actively looking for dark theme for my Pi-Hole dashboard, but I found one. It's super simple to install. I you're like me, follow the instructions on the Github page. Below screenshot was taken after a week of Pi-Hole being live.

Double Bonus: Repository of everything you need to know about RaspberryPi's and what projects one could work on with a RaspberryPi - all in one place! Thank you kind strangers on the internetz.
Protip (since you've made it this far): Make sure you read everything that's being displayed in your CLI during the installation. Half the problems/errors can be solved by reading the CLI and just doing a google search for solutions. It may take a few iterations but eventually you will find the solution.
Onward.
Note: All blogs posts till 2022 were migrated to this platform (react+next+tailwind). While all efforts were made to migrate wihtout any loss, the migration lost some images and broke a bunch of links in old posts. If you spot anything amiss, please notify me?